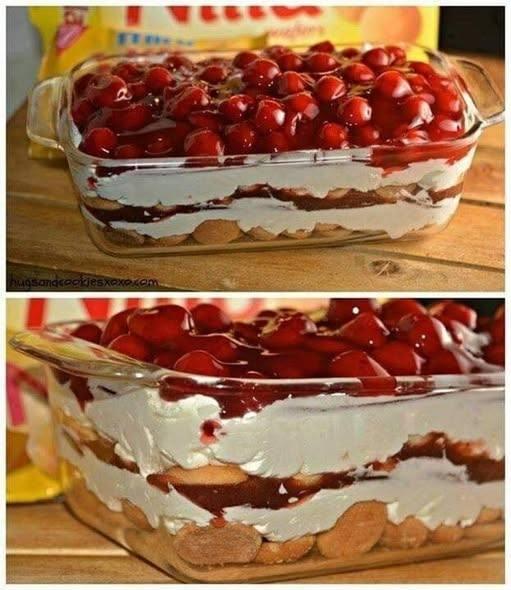
No-Bake Cherry Cheesecake is a dreamy, creamy dessert with a buttery graham cracker crust, a rich and smooth cream cheese filling, and a sweet, tangy cherry topping. It’s easy to make and perfect for any occasion, especially when you want a dessert that doesn’t require baking.
Here’s a simple recipe for No-Bake Cherry Cheesecake:
Ingredients:
For the Crust:
- 1 1/2 cups graham cracker crumbs (about 10-12 crackers)
- 1/4 cup granulated sugar
- 1/2 cup unsalted butter, melted
For the Filling:
- 16 oz (2 cups) cream cheese, softened
- 1/2 cup powdered sugar
- 1 tsp vanilla extract
- 1 1/4 cups heavy whipping cream (cold)
- 1/2 cup sour cream (optional, for extra tanginess)
For the Topping:
- 1 can (21 oz) cherry pie filling (or fresh cherries if in season)
- Optional: Fresh whipped cream for garnish
Instructions:
1. Prepare the Crust:
- In a medium bowl, combine the graham cracker crumbs, sugar, and melted butter. Stir until everything is well combined and the mixture is crumbly.
- Press the mixture into the bottom of a 9-inch pie dish or a springform pan to form an even crust. Use the back of a spoon to pack it tightly.
- Chill the crust in the refrigerator while you prepare the filling, at least 15-20 minutes.
2. Make the Filling:
- In a large mixing bowl, beat the softened cream cheese with an electric mixer until smooth and creamy, about 2-3 minutes.
- Add the powdered sugar and vanilla extract, and continue mixing until well combined.
- In a separate bowl, whip the cold heavy whipping cream with a hand mixer or stand mixer until soft peaks form (about 3-4 minutes).
- Gently fold the whipped cream into the cream cheese mixture until smooth and fully incorporated. Be careful not to deflate the whipped cream.
- Optional: Stir in the sour cream for an extra creamy and tangy flavor.
3. Assemble the Cheesecake:
- Once the crust has chilled and firmed up, spread the cream cheese filling evenly over the graham cracker crust.
- Smooth the top with a spatula and make sure the filling is evenly distributed.
- Refrigerate the cheesecake for at least 4 hours, or preferably overnight, to let it set. The longer it chills, the firmer the texture will be.
4. Add the Topping:
- Just before serving, spoon the cherry pie filling (or fresh cherries) evenly over the top of the cheesecake. If using pie filling, spread it out gently to cover the surface.
- You can also garnish with some fresh whipped cream around the edges for a little extra flair.
5. Serve:
- Slice and serve the cheesecake chilled. It’s best enjoyed within 2-3 days, but it will keep in the fridge for up to 5 days.
Tips:
- Fresh Cherries: If you’re using fresh cherries, you can cook them down into a quick cherry compote with a bit of sugar, cornstarch, and lemon juice, or simply use them fresh for a lighter topping.
- Crust Variation: Feel free to switch up the crust. You can use crushed cookies (like Oreos) or pretzels for a salty-sweet twist.
- Add-Ins: For extra flavor, you can mix in some lemon zest or a bit of almond extract into the filling.
This No-Bake Cherry Cheesecake is so easy to make and perfect for any time you need a quick and impressive dessert. The rich, creamy filling combined with the tart cherries makes every bite irresistible! Enjoy!
