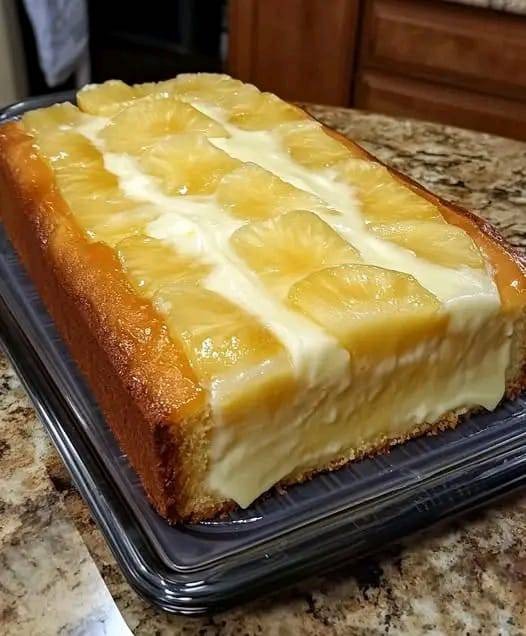
Pineapple Cream Cheese Pound Cake is a deliciously moist and flavorful cake that combines the rich texture of pound cake with the tropical sweetness of pineapple. The cream cheese adds a creamy, dense crumb that makes every slice a treat. This cake is perfect for family gatherings, special occasions, or just when you’re craving a comforting dessert. Here’s a simple recipe to make Pineapple Cream Cheese Pound Cake:
Pineapple Cream Cheese Pound Cake
Ingredients:
For the Cake:
- 2 1/2 cups all-purpose flour
- 1 1/2 tsp baking powder
- 1/2 tsp salt
- 1/2 cup unsalted butter, softened
- 8 oz cream cheese, softened
- 2 cups granulated sugar
- 4 large eggs
- 1 tsp vanilla extract
- 1 tsp almond extract (optional, adds a nice flavor)
- 1 cup crushed pineapple, drained (reserve juice for the glaze, if desired)
- 1/2 cup sour cream (for extra moisture)
For the Glaze (optional):
- 1/2 cup powdered sugar
- 2 tbsp pineapple juice (from the drained pineapple)
- 1/2 tsp vanilla extract
Instructions:
1. Preheat the oven:
- Preheat your oven to 325°F (165°C). Grease and flour a 10-inch bundt pan or a tube pan, or you can use a non-stick spray with flour to ensure the cake doesn’t stick.
2. Mix the dry ingredients:
- In a medium bowl, whisk together the flour, baking powder, and salt. Set aside.
3. Cream the butter, cream cheese, and sugar:
- In a large mixing bowl, beat the softened butter, cream cheese, and sugar together using an electric mixer on medium speed until light and fluffy. This usually takes about 3-4 minutes.
- Add the eggs one at a time, beating well after each addition. Stir in the vanilla extract and almond extract (if using).
4. Add the dry ingredients:
- Gradually add the dry ingredients to the wet mixture, mixing on low speed until just combined. Be careful not to overmix, as this can make the cake dense.
- Stir in the drained pineapple and sour cream, making sure it’s evenly distributed throughout the batter.
5. Bake the cake:
- Pour the batter into the prepared bundt pan or tube pan and spread it out evenly.
- Bake at 325°F (165°C) for about 60-70 minutes, or until a toothpick or cake tester inserted into the center comes out clean.
- If the cake starts to brown too much on top before it’s fully baked, cover the top loosely with aluminum foil and continue baking.
6. Cool the cake:
- Once the cake is done, remove it from the oven and allow it to cool in the pan for about 10 minutes.
- After that, carefully remove the cake from the pan and place it on a wire rack to cool completely.
7. Make the glaze (optional):
- While the cake is cooling, you can make the glaze. In a small bowl, whisk together the powdered sugar, pineapple juice, and vanilla extract until smooth. If the glaze is too thick, you can add a little more pineapple juice until you reach your desired consistency.
- Drizzle the glaze over the cooled cake for a sweet finish.
8. Serve:
- Once the cake is completely cooled and glazed (if using), slice and serve! This cake is delicious on its own, but it’s also great with a dollop of whipped cream or a scoop of vanilla ice cream.
Tips for Perfect Pineapple Cream Cheese Pound Cake:
- Drain the pineapple well: Make sure to drain the crushed pineapple thoroughly to prevent the cake from becoming too wet. You can reserve the juice to use in the glaze or as a drink mixer.
- Room temperature ingredients: For a smoother batter, make sure your butter, cream cheese, and eggs are at room temperature before mixing.
- Make ahead: This cake stays fresh for several days and even improves in flavor as it sits. You can also freeze it for up to 3 months. Just wrap it tightly in plastic wrap and foil before freezing.
- Optional add-ins: If you like, you can add chopped pecans or walnuts to the batter for a little crunch, or stir in a handful of shredded coconut for an extra tropical touch.
This Pineapple Cream Cheese Pound Cake is wonderfully moist, with a subtle tang from the cream cheese and the perfect amount of sweetness from the pineapple. It’s a comforting dessert that pairs beautifully with a cup of tea or coffee!
Are you planning to make this for a special occasion, or just as a treat for yourself? Let me know if you need more tips or want to try different variations!
